Archive for December 2014

Reindeer Cake-pops

Sunday, 14 December 2014

Hey Honeybees!

I have another fun idea for something you can make with the kids over Christmas or maybe for if you're having a party. I'm going to show you how to make some fairly easy Reindeer cake pops.


What you'll need:


Red Smarties/M&M's
300g Madeira cake
300g cooking chocolate
85g ready made butter-cream
Pretzels for antlers
White sprinkles/snowballs for eyes
Black writing icing or a black edible ink pen
Cake pop sticks

Makes 12-14 cake pops
Time 1 hour 40 minutes

How to make:


1. Cut up the Madeira cake and blitz it in a food processor to make crumbs.


Mix together the cake crumbs and butter-cream until moist enough to roll into 4cm balls and still hold their round shape.


Roll the mixture into balls using the palm of your hands and place them onto a baking tray lined with greaseproof paper.Leave them to rest for 20 minutes before chilling.


Place the balls in the freezer for 15 minutes to harden, you want the balls firm but not frozen. Once firm Move the balls to the fridge. 

2. Melt the cooking chocolate in a microwavable bowl making sure the chocolate is deep enough for easy dipping. Microwave for 35 seconds then stir and repeat until the chocolate is melted.


When you are ready to dip, remove a few cake balls from the fridge at a time, keeping the rest chilled.

3. One at a time dip the tip of the cake pop sticks into the melted chocolate and place the dipped end into a cake ball, pushing it no more than half way through the cake ball.


Dip the cake pop into the chocolate and gently lift the pop out of the chocolate and tap off the excess chocolate: hold it over the bowl in your left hand and tap your left wrist with your other hand. The excess chocolate will fall off, make sure to rotate the cake pop so the chocolate doesn't build up on one side making it too heavy on one side.


4. Break the pretzels into antler shapes and place one on either side of the cake pop, hold them in place until they stick.


Stand the cake pop firmly in a hole in either a colander or Styrofoam block. 

5. Repeat with the remaining cake balls. Let the pops dry completely.

6. Using a toothpick, dot a small amount of chocolate in the position of the nose and attach one of the Smarties/M&M'S. Hold the nose in place until it sticks. Again dab some chocolate where the eyes go and stick the white sprinkles/snowballs in the same way, holding until they stick.

7. Repeat with your other Reindeer. To finish, use the edible ink pen to draw on dots for the eyes and mouths. 

The end product should look similar to these.


Aren't they cute? Will you be giving them a go? If you do send me a picture or tag them on instagram as #honeybeechatter.

Thanks for reading my Christmas Bee's
Merry Christmas xx


2 Comments »

Home-made Christmas Wreath

Thursday, 11 December 2014

Hey Honeybees!

Christmas decorations are one of my favourite things about Christmas and I love the personal, unique touches you can make with something home-made. 
This year I decided to make something of my own that no-one else has. I decided to make my own Christmas wreath and share with you how I made it.

What you'll need:


A polystyrene half ring (wreath) in your chosen size.
Red wool
Green wool


Red felt
Green felt
Gingerbread felt
Brown felt
Yellow Felt
Black felt
White felt


Red buttons
Coloured buttons
Strong Red thread
Fabric/strong glue
Sewing needles that fit your thread
Jewel stickers
Polyester super soft filling
Christmas ribbon of your choice


Coloured Berry pins

How to make:


To start you'll need the polystyrene wreath in your chosen size, I used a 35cm one. Wrap around the red  wool of your chosen colour around the wreath. Make sure to leave a bit of wool at the start of the wrapping so you can tie it at the back to the end bit.


Once you have wrapped the amount of wool you want around the wreath, cut the wool and tie it at the back to the other end of the wool. 
Measure how wide the wool you have wrapped around is, so that the next wool you wrap around is the same width.
The next colour I used is green wool, wrap it round the same way you did with the red.


Carry on doing this all the way around the wreath until it is covered with the two colours.


Next you'll need to decide what characters you want on there. I chose to do a Penguin, Reindeer, Gingerbread-man, Christmas pudding and Christmas tree.

Once you know what to put on there, you'll need to find stencils on the Internet of those shapes unless you're good at drawing shapes.


To make a pudding cut out two circles in the brown felt and a half circle in the white felt. Cut the bottom of the white half circle into waves.


Using your fabric glue, stick the white part to one of the brown circles.


Next you'll need to cut out two holly leaves in the green felt.


These should be glued onto the white felt, it can be a bit tricky, let the glue dry before doing the next step.


Once dried, sew a red button just under the leaves to look like a berry.
Next sew the two brown circles together, leaving a gap to stuff the toy stuffing in and then sew the rest.


You make all the other characters in much the same way.
For the Penguin cut out two black circles, two black wings a white heart, a yellow triangle for the beak and two yellow feet. For the eyes I used a hole punch on the black felt. 
Next glue the white heart and other bits onto the black circle, glue the wings and feet to the back of the black circle peeping out.

.
Sew and stuff the Penguin as you did with the pudding.


For the gingerbread man cut out two gingerbread men. Add two eyes and a mouth and sew three coloured buttons on the front.


Sew and stuff as you did with the other shapes.

For the tree cut out two trees, a yellow star and another colour for the tree holder. Glue the star and tree holder onto one of the tree's, then sew on some buttons for baubles.


Again sew and stuff like the others. Next, for the Reindeer cut out two gingerbread coloured Reindeer heads using a stencil and two yellow antlers.


Glue the antlers onto the back of one of the Reindeer heads. Make a red nose using the red felt and a 1 pence piece, glue that and the eyes onto the face.


Sew and stuff Rudolph as with the others.


Once you have done all the characters attach your chosen ribbon to the top of the wreath in a bow,mine has cute Christmas trees on.


Next pin your characters to the wreath using the berry pins and decorate with the jewel stickers.

And that is your wreath finished!


I hope you liked that I know it was a long post but well done if you have got to the end. Have you made any Christmas decorations I'd love to see them? Tag your photos on instagram with #honeybeechatter or post a link in the comments.

Thanks for reading
Merry Christmas. xx

3 Comments »

Melting Snowman cookies

Monday, 8 December 2014

 Hey Honeybees!

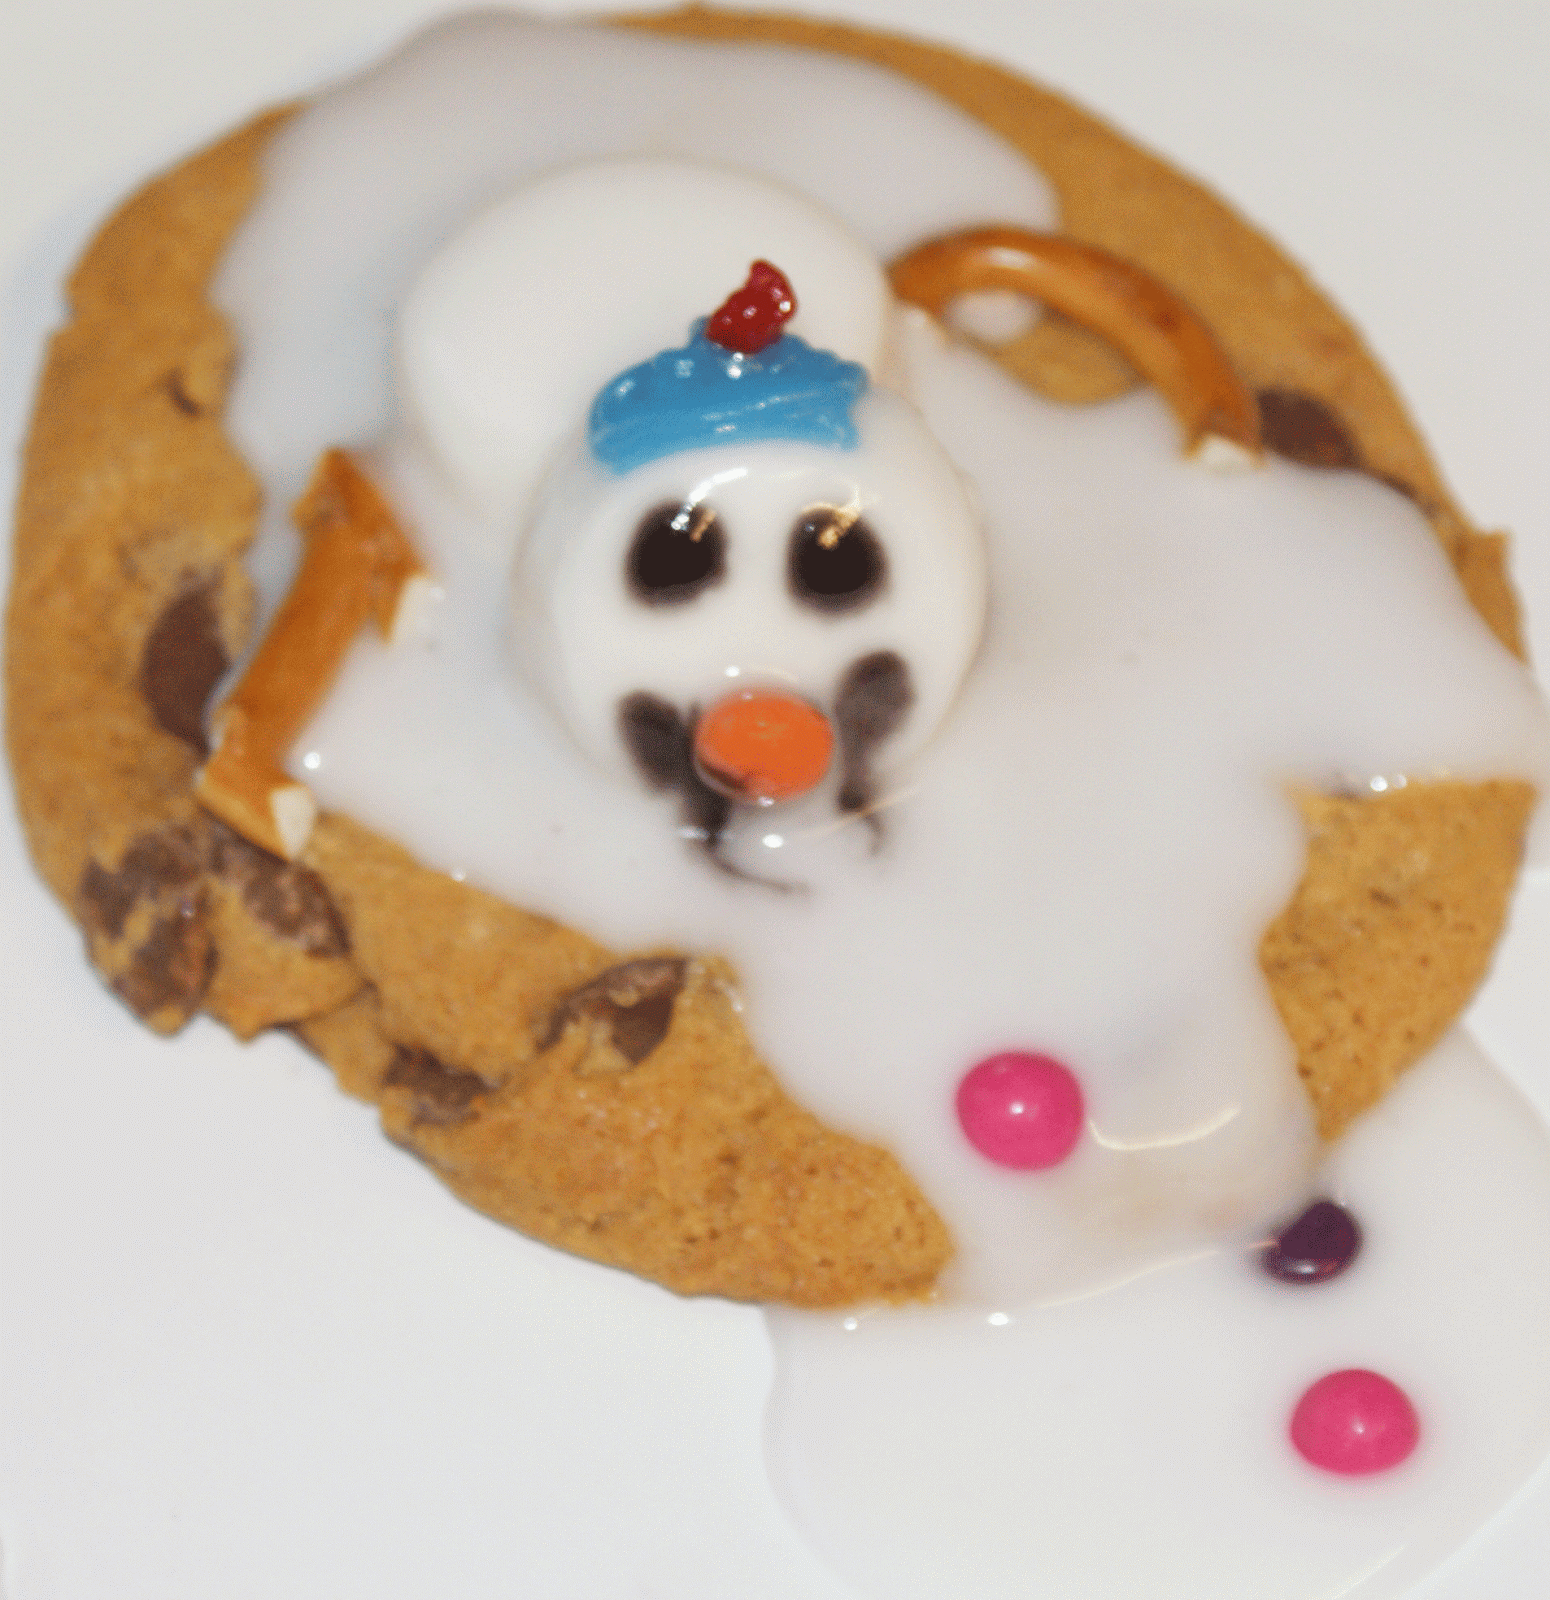
If you're looking for something quick and easy to make with the kids this Christmas then these melting snowman cookies are for you.


What you'll need:


Pretzels
200g Fondant Icing sugar
White Marshmallows
Mini Chocolate Beans
Black writing icing
Pre made Cookies

Preparation time: 30 minutes
Makes 6 cookies

1. Put the icing sugar into a bowl and add 1 teaspoon of cold water at a time until the icing is runny but thick enough to coat the spoon.


2.Snip the Marshmallows in half with wet scissors.


3.Spread some icing onto the cookie and place half a marshmallow in the icing. Use a bit more icing to stick the other marshmallow in front at an angle. Drizzle some more icing on to make it look like a melting snowman.


4. Break the pretzels until they look like snowman arms and place them on the cookie. Using the icing stick a orange mini chocolate bean for the nose. Also add three chocolate beans to the cookie to look like the buttons.


5. Using the black writing icing, pipe two black spots for eyes and a line for the smile. Leave them to set.


My Snowman

Mr Honeybees Snowman with a little hat.


That's it! they're as easy as that. I hope you like them and make them. If you do send me a picture or tag them on instagram with #honeybeechatter

Thanks for reading
Merry Christmas xx

2 Comments »

Supermarket Haul

Sunday, 7 December 2014

Hey Honeybees!

Over the last few days I've picked up a few bits and bobs from Tesco and Asda. I'll start with what I got in Tesco, a couple of Christmas decorations.

The first thing I got was a sparkly Squirrel decoration for the Christmas tree. This little fella cost me £2.50.


Tesco £2.50

The other thing I got from Tesco is a cute little Christmas plaque saying "Tis the season to be jolly fa la la la la la la la la" I paid £4 for this, I think I got it discounted.


Tesco £4
The next things I bought were from Asda. I got two Christmas cushions one that says "You had me at Ho Ho" and one that says "Who ate all the mince pies" They cost £5 each.


Asda £5 each
The next things I got from Asda were Items of clothing. As you may have noticed if you live In the UK it has started to turn very cold. So I thought I better get something to keep me warm. I got myself a new beanie hat it's a pale blue knitted hat with sparkly diamonds around the bottom. This hat cost me £5.


Asda £5
The last thing I bought from Asda was a pale blue jumper. This also has a knitted look and it feels really soft to wear. This jumper was just £12.


Asda £12

One other thing I got that wasn't from a supermarket it was from Primark, but I thought I'd include it as it's so cute. It's a little Christmas hanging sign that says "Don't get your tinsel in a tangle. It only cost £1.50

Primark £1.50
There's everything I bought over the last couple of days. What do you think? Leave me a comment, please.

Thanks for reading.
Merry Christmas xx

Add a comment »